A GUIDE TO THE MANUFACTURING PROCESS OF PRINTED CIRCUIT BOARDS
Revolutionising THE ERA:
Advancement in science and technology allowed humankind to achieve remarkable results in almost every field of life. Nearly all the accessories present today are based on some basic electrical and mechanical principles. A flexible printed circuits board is the backbone of most of the electrical components.
It enables us to reduce the size, meanwhile increasing the efficiency and workability of the electrical and mechanical devices. This miraculous invention improved the design and competence of many components such as computational electronics, including simpler devices like digital clocks, calculators, etc.
A BASIC INTRODUCTION:
Flexible Printed Circuits boards, abbreviated as PCB, is mainly composed of thin strips of conducting material etched from a copper layer and laminated on a nonconductive material. It mechanically and electrically supports the components, making them more reliable and prone to higher load requirements.
PCBs are flexible circuit boards that are molded and shaped to reduce the size, weight, and structure of the equipment as per the requirement, maintaining its sustainability and effectiveness.
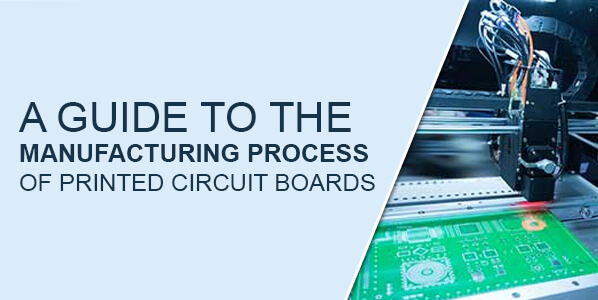
flexible printed circuit board manufacturing process
Having numerous applications, a flexible printed circuit board assembly is needed to be carefully manufactured.
Designers always make sure to avoid any unnecessary error during the designing phase. A minute-error in the designing can cause significant issues in the workability of the component into which it will be installed.
Knowing the fact that PCBs simplifies the operation of equipment, a printed circuit board designing phase is critical and must be undertaken with a lot of care and expertise. The following are some of the necessary steps associated with the designing and manufacturing process.
Step number 1: the designing phase:
Designing PCBs is the foremost step that is done in the manufacturing process. A printed circuit board must be thoroughly compatible with the PCB layout. The designing process is achieved using Altium Designer, OrCAD, Pads, KiCad, Eagle, etc.
Designers always prefer to consult their respected clients about the software typically used in the designing phase. It enables companies to avoid the significant issues that may occur afterwards when PCB’s are implemented physically. Once the design is approved, it is forwarded to the next manufacturing process.
Step number 2: the examination of the design:
After the designing phase, there is always a need to recheck the design, followed by the removal of all the possible errors. The designed outlay is then forwarded to the inspection process. The most commonly used program is called Extended Gerber.
This software encodes all the vital information, including copper tracking, drill drawing, apertures, component notations, and other options. The main task of the software is to run all the designated algorithms to detect any possible error.
It can be considered as the most crucial step in the manufacturing process of flexible printed circuit board design as it also comprises of examining other elements such as width, spacing, tracing the holes and spacing, and maintaining the sizes.
To ensure the proper working of the board, it is preferred by all the manufacturing industries to pass the design through Gerber to eliminate all the possible errors.
Step number 2: conversion from a file to a film
After the file is rechecked thoroughly, it is then sent for the printing on the film. Flexible printed circuit board manufacturers use a particular printer that works perfectly for this operation. Plotter, being a LaserJet printer, uses incredibly precise printing technology to provide high quality and detailed printing and aims to map out the figure of the copper path.
A film is automatically coated by the printer, avoiding any unwanted contact.
Step number 3: Printing the Inner layers
When the coating of the copper layer is done, the next process includes the printing of the inner layers of the board. This process primarily deals with printing of the figure on the copper foil.
The inner part of flexible printed circuit board material comprises epoxy resin and fiberglass that are also substrate material. It is also coated with a lamination protecting the body from dust and other contagious particles.
Step number 4: Removal OF THE Unwanted Copper and photo resistive material
After the printing process, the next process is to remove the unwanted copper layers and photo resistive material. A powerful chemical is used to remove the excess copper and resistive layer.
The dried layer of copper stays protected beneath the protected sheet; meanwhile, the unprotected one gets removed.
Step number 5: Alignment of layers:
To ensure the proper work ability of the flexible printed circuit board, it is essential to align them properly. After the removal of the unwanted copper layers, proper alignment is necessary.
The procedure is followed in a machine called Optical Punch, which permits an exact correspondence, so the registration holes are accurately punched.
Step 6: the Final step layer-up and bonding.
In this step, all the parts are assembled together. The entire operation undergoes an automatic routine run by the bonding press computer. The process happens in two phases: layer-up and bonding.
The method of bonding occurs in a heavy steel table with metal clamps, ensuring every component to fit in the right place.
WE offer THE BEST
Dynamic FPC Designs, being one of the most leading manufacturers of PCBs, provides the finest quality PCBs to our customers. We are the most reliable and authentic manufacturers of Printed circuit boards that have always been guiding customers through the complexities of issues. We provide Engineering Assistance to both fabricators and OME’s, eliminating there need for the in-house design team. At Dynamic FPC Designs, we use the state of the art technology to build authentic and reliable products, enabling our customers a much-enhanced working experience.